PYO Meal Series: Raisin and Sunflower Seed Eggplant Salad

We are featuring our eighth Pick Your Own (PYO) meal, Raisin and Sunflower Eggplant Salad. Yes, you heard it here, our eggplant plants are full of fruit ready to be harvested. What to do with eggplant you ask?... make a delicious salad! Eggplant has a mild flavour that pairs well with bold flavours like bitter pickled onions (an easy how-to-pickle guide is within the recipe instructions of this post). However, the toasted fruit and seeds and fig dressing add a sweet and savoury flavour that pairs perfectly with the pickled onions.

The balance of flavours and nutrients are some of the many highlights of this salad. Not only will you be satisfied with this salad, but it may inspire you to get out of your comfort zone and experience new flavours. 

Please tag us on Instagram (@thamesrivermelons) if you try this recipe!

So much flavour, a must try!

Recipe

*Serves 4-6 

Ingredients

~8 small (2 lbs) Thames River Melons eggplant 

1 cup Thames River Melons herbs (basil and sage)

½ cup feta cheese (I used goats feta, but you may also use goat cheese) 

Toasted Fruit and Seeds 

½ cup of raisins (can substitute for currants or cranberries)

½ cup of sunflower seeds (can substitute for pumpkin seeds or use a nut such as walnuts)

1 tbsp butter

1 tsp Thames River Melons Melon Blossom Honey or maple syrup 

2 dashes of cinnamon 

Dressing 

2 tbsp fig jam 

1 tbsp Thames River Melons Melon Blossom Honey

⅓ cup olive oil 

1 lemon, juiced

Pickled Onion 

1 medium Thames River Melons sweet onion

¾ cup of apple cider vinegar 

¼ cup water

½  tsp salt

1 tsp Thames River Melons Melon Blossom Honey 

Here is what you will need!

Instructions 

1. Preheat the oven to 400°F.

2. Wash the eggplant, then cut into quarter or 1/8th  wedges (depending on the size of the eggplant). Place the  wedges skin side up on a baking sheet, pour olive oil over them and season with salt. Place in the oven and set a timer for 10 minutes.

Eggplant wedges!

3. While the eggplants are in the oven, make the pickled onion brine:  in a small pot on high heat bring the apple cider vinegar, water, salt, and honey to a boil.

4. Thinly slice the onion and place into a mason jar. Pour the boiling brine mixture over top of the onions and shake the jar. Let cool and marinate on the counter for a minimum 20 minutes (the longer the better). 

5. After 10 minutes in the oven, or until the one side of the eggplant looks golden, flip the eggplant and set another timer for 10 minutes. 

Golden and ready to be flipped!

6. Meanwhile, make the salad dressing by adding the honey, olive oil, lemon, and fig jam to a jar. Shake until evenly mixed . 

* There may be chunks of fig, but that is okay!

7. Now, take out the eggplant and let it cool on top of the oven. 

8. While the eggplant cools, add the butter, sunflower seeds, raisins, maple syrup/honey, and cinnamon to the same pot as the vinegar brine and put on medium heat. Stir until the sunflower seeds get golden and crisp. 

* This is my favourite step as it gives off the most delightful aroma. 

9. Assemble the salad: place the roasted eggplant wedges on a serving plate, then  remove the pickled onions from the jar (look at the waste less notes for more ideas on how to use the remainder of the pickled onions) and add them on top of the eggplant wedges. Add the crumbled feta cheese, sprinkle on the fruit and seed mixture and lastly, cover the salad in dressing and garnish with sage and basil leaves. 

10. Serve up warm or cool! This makes a perfect side dish to share with family & friends.

Tada! Raisin and Sunflower Seed Eggplant Salad!

Cost

This salad requires approximately 2 lbs of eggplant. Eggplant PYO cost is $2/lb. Therefore, the PYO vegetables for this salad cost $4 in total. 


Nutritional Density

Eggplants contain manganese and vitamin K which are minerals and vitamins essential for good bone and blood health. Both micronutrients play a role in blood clotting. Manganese specifically plays a large role in reactions that contribute to bone formation and bone density (1).

For 100g of eggplant, there is 0.232 mg of manganese and 3.5µg vitamin K (2). 

The recommended dietary allowances (RDA) for manganese is 1.8 for female adults and 2.3 for males adults. Therefore, 100g of eggplant provides females with 13% of RDA and males with 10% of RDA. The adequate intake (AI) for vitamin K is 90µg for male adults and 120µg for female adults. Therefore, 100g of eggplant gives 4% of AI for females and 3% of AI for males (3). 

The pickled onions may provide probiotics. Probiotics are the good bacteria present when a food item is fermented. The fermentation process uses the bacteria present on the fruit or vegetable and a salt/water/sugar brine to activate the bacteria. When consumed, these bacteria may transport to the colon and help your digestive tract maintain good health (4). 


Storage

This salad will keep in the fridge for 2 days. If planning to store, we recommend keeping the dressing on the side as the eggplant may become soggy. 

The dressing will keep for 5-7 days in an airtight container in the fridge.


Waste Less Notes 

You may not use all of the pickled onions (depending on how much your crowd likes onions). However, these pickled onions can be stored in the fridge for up to 2 weeks in a sealed container and used in a number of delicious recipes, especially in tacos, stir fry, and as a pizza topping. 


Modifications

This recipe may be modified to suit your needs. You may substitute the raisins for any dried fruit, like currants or cranberries. Even diced dates would work great! As for sunflower seeds substitutes, pumpkin seeds or if you have nuts on hand, then walnuts or pecans would be lovely. 


Recipe developed and photographed by dietetic interns Lexie Nobbs and Lise Wolyniuk and reviewed by Alex Chesney, RD


References

  1. National Institutes of Health. (2021). Manganese: Fact Sheet for Health Professionals. Retrieve August 17, 2024, from https://ods.od.nih.gov/factsheets/Manganese-HealthProfessional/ 

  2. Health Canada. (2023). Canadian Nutrient File. Government of Canada. Retrieved August 17, 2024, from https://food-nutrition.canada.ca/cnf-fce/newSearch 

  3. Health Canada. (2023). Dietary Reference Intake Tables: Reference values for vitamins and minerals. Government of Canada. Retrieved August 17, 2024, from https://www.canada.ca/en/health-canada/services/food-nutrition/healthy-eating/dietary-reference-intakes/tables/reference-values-vitamins.html#tbl1 

  4. Valentino V, Magliulo R, Farsi D, et al. Fermented foods, their microbiome and its potential in boosting human health. Microb Biotechnol. 2024;17(2). doi:10.1111/1751-7915.14428 

Pick Your Own Meal Series: Grilled Vegetable Pasta Salad

We are featuring our next Pick Your Own (PYO) meal, Grilled Vegetable Pasta Salad. Craving pasta…but also wanting something summery and fresh? Presenting the long weekend Grilled Vegetable Pasta Salad, because it ages like fine wine, feeds a crowd, and you grill the veg on a barbecue which is perfect for keeping your house cool during those hot days. 

We made this salad to go with a BBQ meal including steak, halloumi, and tofu, which provided protein, but you could always add protein of your choice directly to the salad. Things like tuna, or chicken would work great!

Please tag us on Instagram (@thamesrivermelons) if you try this recipe!

Look at all the veggies!

Recipe

*Serves 10 - 12

Ingredients

2-3 Thames River Melons zucchini 

2-3 cups Thames River Melons grape tomatoes

½ medium Thames River Melons red onion

1 Thames River Melons red bell pepper

2 cups arugula 

½  cup capers

½ kalamata olives 

200g of dried pasta (we are using penne)

200g of feta 

1 tsp salt (for boiling pasta)

For the Dressing

⅓ cup of olive oil 

Salt and pepper

⅓ cup red wine vinegar 

1 tbsp Thames River Melons honey

2 tbsp Thames River Melons garlic scape mustard 

1 cup of fresh Thames River Melons herbs (dill, basil, oregano, etc)- please feel free to add more 


Prepping the produce!

Instructions 

1. Prepare the vegetables, beginning with the zucchini and bell pepper, for grilling. Wash and then cut zucchinis in half lengthwise then half again to get four pieces. Sprinkle salt over the zucchini to help draw excess water out, and set aside.

Cut the red pepper into quarters and set aside.

2. Slice the red onion with the grain and separate, halve the grape tomatoes, and mince fresh herbs. We used dill and basil.

3. Peel, crush and mince 3-4 garlic cloves

4. Dab the zucchini with a paper towel to remove water. Add olive oil, salt and pepper to the zucchini and red pepper, ensuring all is well coated.

5. Add pasta to boiling water and cook according to instructions. 

6. Place the zucchini and red pepper on the BBQ.

7. Begin to assemble the salad. In a large serving bowl, place grape tomatoes, olives, capers, red onion, arugula, dill, basil, and crumbled feta

8. Make the salad dressing. Combine olive oil, minced garlic, dijon mustard, red wine vinegar, honey, salt and pepper and mix

9. Remove the vegetables from the grill.

10. Drain the pasta and set aside to cool slightly.

11. Cut the grilled vegetables into bite sized pieces.

12. Add the pasta, grilled vegetables, and dressing to the serving bowl. Toss and serve.

Grilled Vegetable Pasta Salad

Cost 

The zucchini weighed 1lb. The bell pepper was 0.35lb. The tomatoes were 0.8lb. 

PYO zucchini is $0.50/lb, bell peppers cost $2/lb, and grape tomatoes cost $0.80/lb. 

Therefore, the PYO vegetables in this dish cost approximately $2 in total. 

Storage

This salad will keep in the fridge for 4 days. If planning to store, we recommend keeping the arugula separate and adding at time of consumption. However, dressing the salad is recommended as the pasta and vegetables can marinate over time.

Waste Less Notes 

It is an easy way to incorporate vegetables that may be on their last days of freshness. 

Modifications

This recipe may be modified to suit your needs. You can add or subtract vegetables depending on what is in season and what you have on hand. 

Recipe developed and photographed by dietetic interns Lise Wolyniuk and Lexie Nobbs and reviewed by Alex Chesney, RD

Pick Your Own Meal Series: Cucumber Salad, Two Ways

PYO Meal Series: Cucumber Salad, Two Ways

This is our fifth Pick Your Own (PYO) meal, featuring cucumbers from the farm, two ways: a Cool Creamy Cucumber Salad and an Acidic Cucumber Salad. 

The cucumber plants are thriving right now in the PYO patch! What can you do with a cucumber? Here we will show you how to turn plain ole’ cucumbers into two different deliciously elevated cucumber side salads that will pair perfectly with your BBQ plans this summer. 

The field cucumbers we have here on the farm are different from the English cucumber you may be used to seeing in your local grocery store. For these recipes, we recommend roughly peeling the cucumber skin, as it is a bit tough and can be hard to chew. In addition, we recommend halving the cucumbers and lightly scooping out the insides of the medium to large sized ones, to reduce the water content and remove the larger seeds. 

Please tag us on Instagram (@thamesrivermelons) if you try this recipe!

Recipe for The Creamy Cucumber Salad

*Serves 4 

Ingredients

1 lb Thames River Melons cucumbers

1/2 cup Thames River Melons dill 

2 small Thames River Melons red onions and their greens

4 tbsp white vinegar or pickle juice  

¾ cup Greek yogurt 

1 tsp salt 

Juice of half a lemon

Instructions 

1. Thoroughly wash the cucumbers, onions, and dill.

2. To make the dressing, whisk together pickle juice (or vinegar), yogurt, salt and lemon juice + zest in a salad bowl. Finely chop the dill and add to the dressing.

*It is most efficient (and creates less dishes!) to make the salad dressing in the same bowl you plan to serve the salad in.

3. Slice onion from north to south* (greens to the root or ‘with the grain’) and add to the dressing bowl. Save some of the greens to slice and add as garnish). Marinate the onions in the dressing while preparing the cucumbers. 

*Slicing onion ‘with the grain’ yields a more mild flavour, important when eaten raw

4. Roughly peel the cucumbers, and cut them each in half, then lightly scoop out the inside of the larger ones. Next slice the cucumber halves into half-moon shapes.

4. Chop dill and add to  the salad bowl with the dressing. Add the cucumber slices as well.

5. Toss the salad in the dressing until the cucumbers are fully coated.

6. Garnish with onion greens.

This salad pairs well with a Greek inspired dinner, such as Souvlaki style chicken.  

Recipe for The Acidic Cucumber Salad

*Serves 4 

1lb Thames River Melons cucumbers (we suggest small to medium)

2 Thames River Melons onions and the greens 

6 tbsp rice vinegar or white vinegar

1 tbsp Thames River Melon Blossom honey 

1 + ½ tbsp soy sauce

2 tsp toasted sesame oil 

¼ tsp red pepper flakes

Juice of half a lemon

Instructions 

1. Wash cucumbers and onions.

2. To make the salad dressing, in a salad bowl whisk together the vinegar, sesame oil, soy sauce, honey, red pepper flakes, and lemon juice 

*It is most efficient (and creates less dishes!) to make the salad dressing in the same bowl you plan to serve the salad in.

3. Slice onion from north to south* (greens to the root or ‘with the grain’) and add to the dressing bowl. Save some of the greens to slice and add as garnish). Marinate the onions in the dressing while preparing the cucumbers. 

*Slicing onion ‘with the grain’ yields a more mild flavour, important when eaten raw

4. Lightly peel the cucumbers, then halve them. Scoop out the insides of the largest ones. Cut  the cucumbers into half-moon and add to the salad bowl with the dressing and onions. 

5. Garnish with onion greens.

6. Toss, then let sit for 5-10 minutes. Toss again, ensuring all cucumbers are coated in dressing. Let sit again for 5-10 minutes. 

7. Enjoy! This version of the cucumber salad pairs beautifully with sushi, or a teriyaki chicken. 

We ordered our favourite local sushi to complement the flavours of this salad. This lunch was a great balance between homemade and takeout food. 

Cost 

PYO cucumbers are $1/lb. PYO onions are $4/lb. PYO dill is $4/lb. 

In total, the cost of PYO cucumbers per salad is $1. The onions cost PYO onions per salad $1 and dill (for the creamy cucumber salad) was $0.20. 

Nutritional Density

Did you know? Cucumbers contain 95% water (1). These salads will surely keep you hydrated on a hot summer's day. Not only are cucumbers good for providing water to your body but they also contain an abundance of electrolytes such as potassium, magnesium, phosphorus, and calcium (1). These electrolytes control our bodies’ water balance, helping it to function optimally.  

Storage

These salads will keep in an airtight container in the fridge for 2-3 days.

All of the onion greens won’t be needed for these salads, but you can freeze the remainder and use in your next stir-fry!

Modifications

This recipe may be modified to suit your needs.

In terms of the Creamy Cucumber Salad, you may substitute the Greek yogurt for a plain dairy, or lactose-free yogurt. 

Recipes developed and photographed by dietetic interns Lexie Nobbs and Lise Wolyniuk and reviewed by Alex Chesney, RD

Reference:

Health Canada. (2023). Canadian Nutrient File. Government of Canada. Retrieved July 21, 2024, from https://food-nutrition.canada.ca/cnf-fce/newSearch .

Potato Ham Soup

Servings: 6

Ingredients:

2 tbsp butter

3 cloves garlic, minced

1 white onion, chopped

1 medium sized carrot, chopped

1 celery stalk, chopped

4 white potatoes, chopped to bite sized

½ head of cauliflower, roughly chopped to bite sized pieces

1 ham steak (or about 1 cup ham), chopped

6 cups vegetable stock

¼ cup cream

1 tsp thyme, ground

Salt and pepper to taste

Instructions:

  1. In a large pot, melt the butter. Add the onions, carrots, and celery and saute until tender. Add the garlic and stir for 1 minute.

  2. Add the vegetable stock, and potatoes to the pot. Cook on low-medium heat for about 10 minutes. Add the cauliflower and ham and continue to cook until cauliflower and potatoes are tender.

  3. Add ground thyme, and season with salt and pepper. Remove from heat and stir in cream.

  4. Serve hot.

Note: you can serve this topped with cheddar cheese, bacon bits, a dollop of sour cream, and sliced green onions for added freshness and flavour!

A Guide to Storing Green Onion

Properly storing green onions can help maintain their freshness, flavor, and texture, allowing you to enjoy their culinary benefits for a longer period. Follow this guide to ensure you store your green onions effectively:

Choose Fresh Green Onions: Visit our pick-your-own patch and select green onions that are firm, crisp, and have vibrant green tops. Avoid ones with wilted, yellowing, or slimy leaves.

Store Unwashed: It's best to store green onions without washing them, as moisture can promote spoilage. If they are dirty, gently wipe off the dirt with a damp cloth or paper towel.

Refrigerator Storage: Store in the refrigerator. There are a few methods to store green onions. These methods help maintain the right level of moisture while providing adequate ventilation.

Method 1:

  • Place the green onions in a heavy bottomed jar, glass, or vase root-side down. Fill the container of choice with cold or room temperature water, just enough to cover the roots.

  • Cover the green onions with a plastic Ziploc bag. Clinch the bag slightly around the green onions to store some of the humidity within the bag and zip the bag closed as much as possible.

  • Transfer the jar to the refrigerator. Replace the water every couple of days.

Method 2:

  • Alternatively, instead of placing the green onions in a jar, wrap the green onions in a slightly damp paper towel. This provides the humidity needed for proper storage.

  • Place the wrapped green onions inside a plastic Ziploc bag or storage container; it does not need to be sealed airtight. Remoisten the paper towel if it becomes too dry or too wet.

Utilize Quickly: While green onions can be stored, they are best used fresh for maximum flavor and texture. Try to use them within 1-2 weeks of purchasing.

Freezing Green Onions: You may also choose to freeze them for later use. Chop the green tops and white bulbs separately, spread them on a baking sheet to freeze individually, and then transfer them to an airtight container or Ziploc freezer bag. Frozen green onions are best used in cooked dishes rather than fresh ones due to the change in texture.

The jar or damp paper towel methods are great for storing various herbs that have delicate leaves and stems. Try these methods with other herbs as well!

  • Parsley

  • Cilantro

  • Basil

  • Mint

  • Dill

  • Chives

  • Oregano

  • Thyme

  • Rosemary

  • Sage

Smashed New Potato Salad with Dijon Vinaigrette

This week we are excited to share a delicious-looking recipe with you courtesy of our friends over at The Grateful Plate! These ladies are big supporters of our Farm Market & Pick-Your-Own Patch, and were generous enough to create a recipe using goodies found in our patch! We think this potato salad would be the perfect addition to your long weekend. You can pick just about all of the ingredients yourself from our veggie patch, or grab them pre-picked from our farm market if you’re running short on time. Either way, give it a shot, and let us know what you think!

The Grateful Plate smashed potato salad - TRM.jpg

*Serves 4-6

A big and bright salad that incorporates farm fresh radishes, peas and new potatoes.  It tastes amazing when served while the potatoes are still warm.  Serve with a side of protein of choice for an easy summer meal!

Ingredients

Salad mix:

2 pounds new potatoes, washed, either small ones or larger ones cut to equal pieces

2 tbsp olive oil

2 tsp minced garlic

1/2 tsp salt

1/4 tsp pepper

6 cups mixed spring greens, washed

4 radishes, thinly sliced

1/4 cup fresh shelled peas

1/2 small red onion, sliced

4 eggs, hard boiled and peeled

1 green onion top, thinly sliced

Dressing:

1/2 cup olive oil

1/3 cup apple cider vinegar

2 tbsp Dijon Mustard

1 tsp minced garlic

salt and pepper

Instructions

  1. Preheat oven to 400 degrees and line a sheet pan with parchment; set aside.

  2. Add all of the dressing ingredients to a small jar and shake well; set aside.

  3. In a large bowl mix the potatoes with the olive oil, garlic, salt and pepper.  Place on the sheet pan and bake for 30 minutes, until potatoes are tender and crispy brown.  Remove from the oven and use the bottom of a mug to gently smash the potato pieces.  They should still remain intact, just smushed! Set aside while you prepare the rest of the salad.

  4. On a large platter layer the salad ingredients: start with the greens on the bottom and scatter the sliced radishes, peas and onion on top.  Cut the eggs in half and place on the salad.   Tuck in the bits on warm golden potatoes and finish with a sprinkle of green onion.

  5. Serve immediately with the dressing.

Renee Mackey-Burson

The Grateful Plate

www.thegratefulplate.ca

Instagram - @the.grateful.plate

Facebook - @thegratefulplate.ca


Thai Coconut Curry Soup

Today’s freezing temperatures and blustery wind have me craving more soup. Do you feel it too? This recipe is sure to warm you through and through thanks to the flavours of ginger and Thai curry paired with comforting butternut squash and coconut milk. As a bonus, you’ll get a generous dose of vitamins A and C thanks to the squash, and a hit of protein and iron offered up by the red lentils.

The iron found in plant-based proteins is called non-heme iron and is a bit harder for our bodies to absorb than heme iron (found in meat). However, pairing non-heme iron with Vitamin C increases absorption. See where I’m going? The Vitamin C from the squash will work in tandem with the iron in the lentils to fuel you more efficiently. Another bonus of red lentils are their quick-cooking nature and their tendency to start to disintegrate when cooked. This makes them essentially impossible to detect; a great way to power up the picky people in your lives!

Give it a try today and let me know what you think.

Thai Coconut Squash Soup.jpg

*Serves 4

Prep Time: 15 minutes

Cooking Time: 20 minutes

Ingredients

1 tablespoon cooking oil

1 bell pepper, diced

1 onion, diced

½ teaspoon ground ginger

½ teaspoon black pepper

¼ teaspoon salt

1 –2 tablespoons Thai red curry paste (depending on your spice preference; I used 2!)

1 can coconut milk

3 cups low-sodium vegetable broth

4 cups butternut squash, peeled and cubed

1 carrot, diced

½ cup red lentils

Instructions

  1. Heat oil in a medium pot, over medium heat. Place 1 piece of diced onion in the pot to test the temperature of the oil. Once the onion starts to sizzle, add the remaining onion.

  2. Sauté the onion for 1-2 minutes, until it begins to soften. Then, add the diced bell pepper and continue to sauté for another 1-2 minutes.

  3. Once the vegetables have softened, and onion has started to become translucent, add the ginger powder, salt, pepper, and Thai curry paste. Mix to combine.

  4. Next, add the coconut milk. Stir to combine, making sure to scrape the bottom of the pan, gathering up all of those flavourful bits that may have started to stick!

  5. Add the vegetable broth, again stirring to combine.

  6. Finally, add the butternut squash, carrot, and red lentils. Stir to combine, then place the lid on the pot and bring to a boil.

  7. Once the pot reaches a boil, reduce the heat and simmer for 15 – 20 minutes.

  8. At this point, the butternut squash should be soft, and the lentils should have started to disintegrate.

  9. Blend the soup with an immersion blender until smooth and glossy.

  10. Top with your favourite roasted winter veggie and serve with a slice of whole wheat bread for a filling and nutritious meal. Enjoy!

Recipe created by Alex Chesney, RD

Leek and Potato Soup

The weather has been unpredictable lately — snowy and cold one day then slushy and warm the next. Regardless of the temperature, one thing has remained constant, and that’s my desire for soup. The winter months have always made me crave this warm and comforting meal, and that hasn’t changed this year! Their ease and versatility are also a great selling point. I de!ided to start off 2019 with a classic: leek and potato!

Both leeks and potatoes are crops that keep well long after harvest. The farm has settled into a quiet rhythm for these next few months, but we do still have a few veggies kicking around the barn. I rescued a bundle of leeks and a handful of potatoes to pair with leftover veggies from my fridge and then hit the kitchen!

When preparing the potatoes, I washed them thoroughly then removed any eyes and marks, otherwise leaving the skin intact. As with many fruits and vegetables, the skin houses the majority of the nutrients, particularly the fibre! When it comes to leeks, many consumers are not aware of their nutrition content. Are you? Just in case, I’ll fill you in! Leeks contain an incredibly high amount of Vitamin K, a fat-soluble vitamin that helps our bodies heal wounds, and maintain the health of blood vessels and bones. Because it’s fat-soluble, it’s best absorbed when paired with fat. In this recipe, both the butter and the milk/cream contribute fat. Pretty neat, hey?

Overall, this soup is flavourful, creamy, and satisfying. It makes the perfect lunch for a chilly weekend, or a quick and easy dinner for those busy weeknights. Give it a try and let me know what you think!

Leek and Potato Soup.jpg

*Serves 4-6

Prep Time: 10 minutes

Cooking Time: 25 minutes

Ingredients

1 tablespoon cooking oil or butter

3 large leeks*, white parts sliced into coins

2 cloves garlic, minced

1 bell pepper, diced

1 large carrot, diced (or 1 cup frozen diced carrots)

2 stalks celery, diced

½ teaspoon paprika

½ teaspoon dried thyme

¼ teaspoon pepper

¼ teaspoon salt

4 cups low-sodium vegetable stock

4 medium potatoes, cubed

½ cup milk or cream

Instructions

  1. Heat oil or butter in a medium stock pot over medium heat. Add one small piece of leek and wait for it to start to sizzle.

  2. Once sizzling, add the rest of the sliced leeks. Cook for 3 minutes or so, stirring frequently, until leeks are softened.

  3. Add minced garlic and other diced vegetables. Cook for another 3-4 minutes, again stirring frequently.

  4. Next, add herbs and spices, mixing until all vegetables are evenly coated. Cook for another 1-2 minutes.

  5. Add the vegetable stock and the potatoes and bring to a boil. Once boiling, reduce heat to medium-low (maintaining a gentle simmer) and cook for approximately 20 minutes.

  6. Once potatoes are softened, remove soup from heat. Blend the soup using an immersion blender or upright blender until a creamy consistency is achieved. Add the milk or cream and stir to combine.

*Be sure to wash the leeks very thoroughly, as although they are pre-washed before being sold, dirt has a way of working its way inside of this tasty veggie!

Recipe created by Alex Chesney, RD

Late Summer Chowder

Cooler weather is approaching, the official start of autumn is around the corner, and soup season has arrived! I’m looking forward to being able to comfortably use the stove and oven again and put them to work cooking up the tasty fall recipes I have in mind. To start us off we’ve got a hearty, delicious, and easy chowder. Flavour is built by cooking the vegetables in stages, and coating them with a lovely combination of spices. A low-sodium vegetable broth and just a dash of salt at the end will ensure a hearty-healthy final bowl, and all the wonderful vegetables featured make for a soup that is satisfying and filling. Take advantage of these still-in-season vegetables combined with comfortable cooking temperatures and try this recipe today. Let me know what you think!

Soup to Share.jpg

Ingredients

1 tablespoon oil

1 red onion, diced

3 cloves garlic, minced

1 small jalapeno, diced (more or less, depending on spice tolerance!)

2 bell peppers, diced

2 cobs sweetcorn, cooked & removed from the cob

1 zucchini, diced

5 small red potatoes, cubed

1 teaspoon paprika, oregano, and parsley (each)

½ teaspoon thyme

2 tablespoons flour

3 cups low-sodium vegetable broth

1 cup milk

Salt & pepper, to taste

Instructions

  1. Heat oil in pan over medium-high heat until hot. A handy trick to test the readiness of the pan is to toss in a small piece of diced onion along with the oil. When it starts to sizzle you know you’ve reached the right temperature!

  2. Once hot, add all the onion to the pan. Cook for 5 minutes until translucent and softened.

  3. Add the garlic and peppers and cook for another 5 minutes, stirring frequently.

  4. Add the corn, zucchini, spices, and flour. Mix until vegetables are evenly coated with the spices & flour.

  5. Next, slowly add the vegetable broth, stirring constantly.

  6. Once all the broth has been mixed in, add the potatoes. Lower the heat slightly and bring the mixture to a simmer. Cook for 15-20 minutes, until potatoes are softened.

  7. Add the milk and stir until hot.

  8. Season with salt and pepper, to taste.

  9. Enjoy!

Recipe created by Alex Chesney, RD


Sweet Potato (Squash) Soup

Sweet Potato (Squash) Soup
*Serves 4-6

This soup features a few of the many fall veggies we have on the farm – delicata squash (aka sweet potato squash), sweet potato, and onion. Both of the squash are small and easy to peel & chop. These powerhouse ingredients are chock full of not only delicious flavour, but also vitamins A and C! Blending the soup + adding some coconut milk provides an amazingly creamy texture and the cinnamon and nutmeg add some wintertime depth to the overall flavour. 

Ingredients:
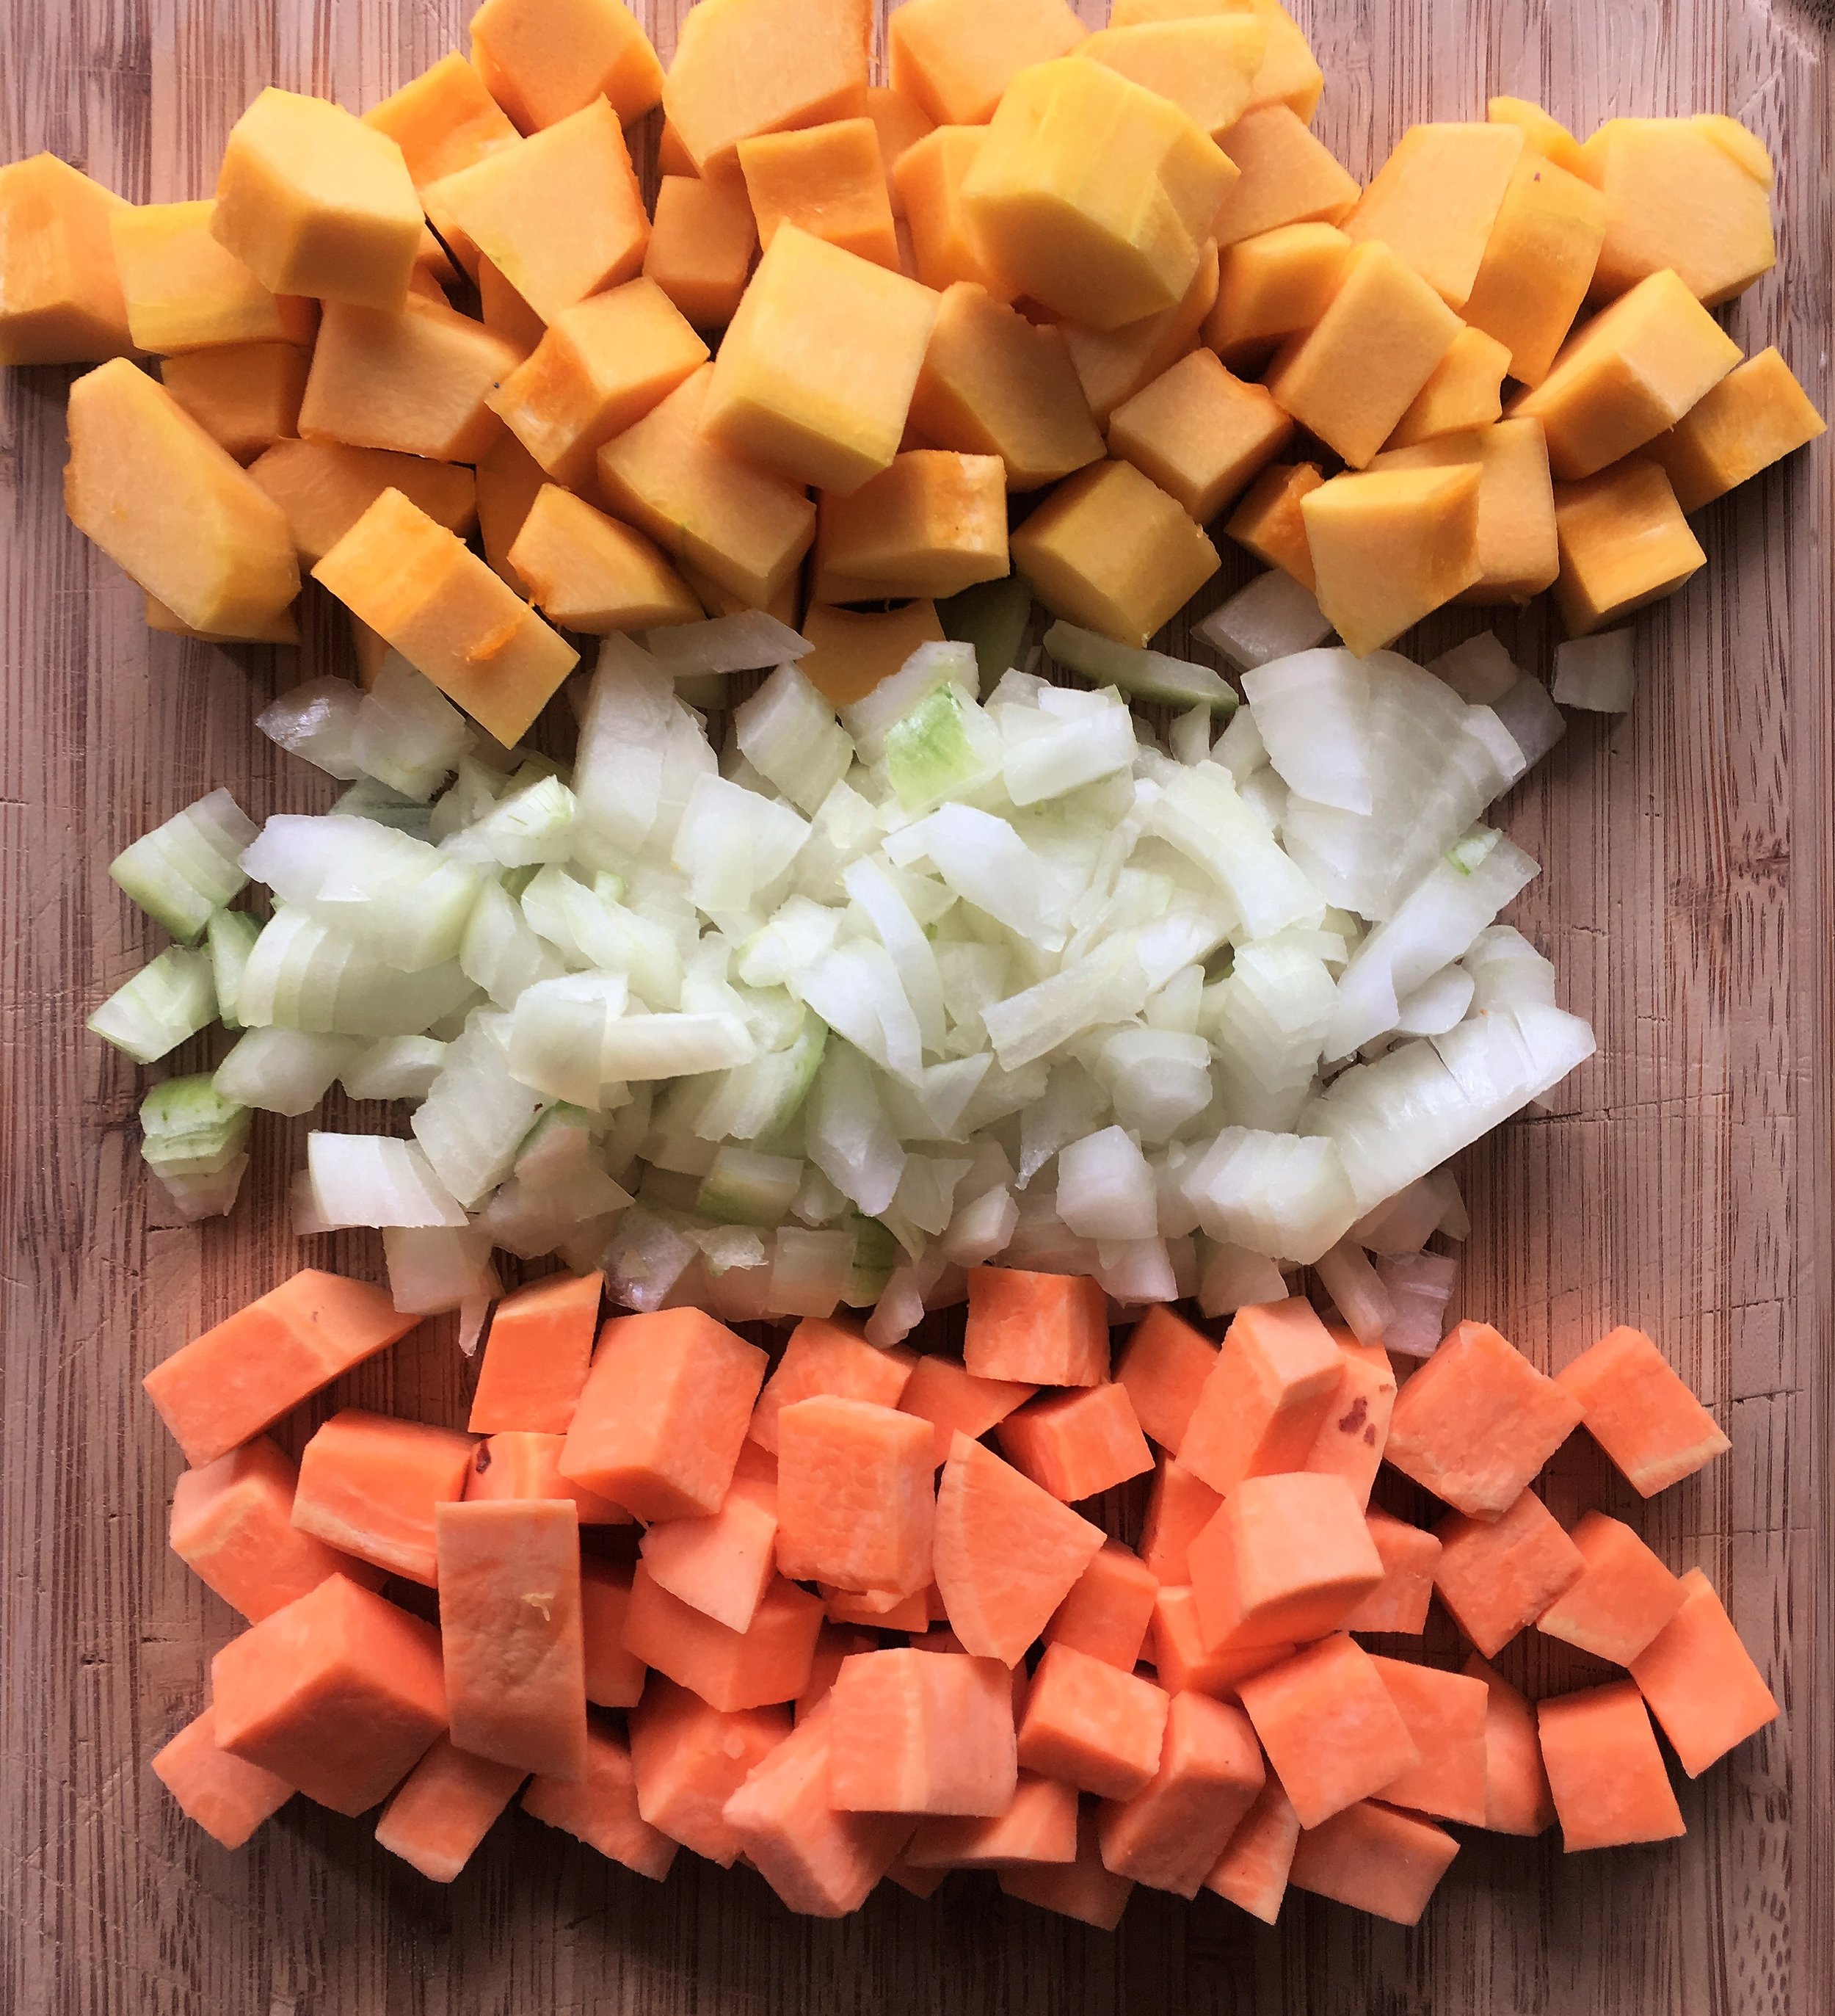
2 delicata squash (aka sweet potato squash), peeled and cubed
2 large sweet potato, peeled and cube
1 onion, diced
2 cups low-sodium vegetable broth
1/2 cup coconut milk
Pinch of cinnamon and nutmeg
Pinch of salt and pepper

Instructions

  1. Place vegetable broth in a medium-sized pot and add the diced onion and peeled and cubed squash and sweet potato over medium-high heat.

  2. Bring mixture to a boil and then lower heat and simmer for approximately 20 minutes or until squash and sweet potato are tender.

  3. Blend soup mixture using an immersion blender or a blender. If using a blender, allow soup to cool and then transfer in small batches.

  4. Once soup is blended, mix in coconut milk and spices. Add salt and pepper to taste.

    Recipe created by Alex Chesney, RD

Oven-Baked Onion Rings

Onion rings make the perfect addition to a summertime burger & beer on the patio, especially on a long weekend! Although the deep-fried version is super delicious, its high fat content makes it something to be enjoyed just once in a while. Fortunately, I created this tasty oven-baked version that is virtually fat-free, while still giving you that crunch & taste you may be craving. Try them at home today!

*Makes approximately 18 onion rings

Ingredients:
1 fresh sweet onion
¼ cup flour
2 eggs
1 tbsp milk
1-2 cups panko bread crumbs
1 tsp garlic powder
½ tsp salt

Instructions

  1. Line a baking sheet with parchment paper and set aside. Preheat oven to 450 F.

  2. To prepare the onion, remove the greens and the root. Place the onion on its side, and then carefully slice into ¼ inch slices. Separate the slices into individual rings and set aside.

  3. Set up an onion ring prep assembly-line using 3 bowls. Work from left to right: in the first bowl, place the flour, in the second, whisk together the eggs & milk, and in the third, mix together the bread crumbs, garlic powder, and salt.

  4. Begin to assemble the onion rings. One at a time, dip the onion rings into the flour and coat evenly. Next, drop the onion slices into the egg mixture and again, coat evenly. Finally, place the onion rings in the panko mixture and coat evenly once again. Repeat this process for each individual onion ring.

  5. Place coated onion rings on the baking sheet. Once all onion rings are prepped, place in the preheated oven and bake for 12-15 minutes. The coating on the onion rings should be nicely browned. Remove from oven and enjoy!

*Tip: The panko mixture can get quite gummed up from the egg & milk mixture. To ensure the final stage of coating is successful, it helps to only put a little panko at a time into the third bowl, and refresh every 3 rings or so.

Recipe created by Alex Chesney, RD