Potato Ham Soup

Servings: 6

Ingredients:

2 tbsp butter

3 cloves garlic, minced

1 white onion, chopped

1 medium sized carrot, chopped

1 celery stalk, chopped

4 white potatoes, chopped to bite sized

½ head of cauliflower, roughly chopped to bite sized pieces

1 ham steak (or about 1 cup ham), chopped

6 cups vegetable stock

¼ cup cream

1 tsp thyme, ground

Salt and pepper to taste

Instructions:

  1. In a large pot, melt the butter. Add the onions, carrots, and celery and saute until tender. Add the garlic and stir for 1 minute.

  2. Add the vegetable stock, and potatoes to the pot. Cook on low-medium heat for about 10 minutes. Add the cauliflower and ham and continue to cook until cauliflower and potatoes are tender.

  3. Add ground thyme, and season with salt and pepper. Remove from heat and stir in cream.

  4. Serve hot.

Note: you can serve this topped with cheddar cheese, bacon bits, a dollop of sour cream, and sliced green onions for added freshness and flavour!

Root Vegetable Sheet Pan Dinner

Sheet pan dinners are super easy and filling! You can omit the protein and use this as a side dish as well. Use any vegetables that you like and that you have on hand. This is a great way to use up those veggies that aren’t looking so fresh, but because we are roasting them, they are perfect for the job!

Ingredients: recommendations only

2 medium carrots, cut into wedges

1/2 onion (red/yellow/white, whatever you have!)

1 parsnip

½ beet, chopped (will change the colour of other vegetables on the pan)

5 mushrooms, cut into quarters

1 head of broccoli

2-3 potatoes (white, red, sweet, whatever you want!)

5-6 Brussels sprouts, halved

5 turkey sausages (if using as a meal)

2-3 generous tablespoons of olive oil or another

1 tsp garlic powder

1 tsp onion powder

½ tsp Italian seasoning

Instructions:

  1. Preheat the oven to 375°F.

  2. Cut up all vegetables and slice turkey sausages. Lay out on a roasting pan.

  3. Cover in oil, and seasonings.

  4. Bake for about 40 minutes, or until potatoes are soft.

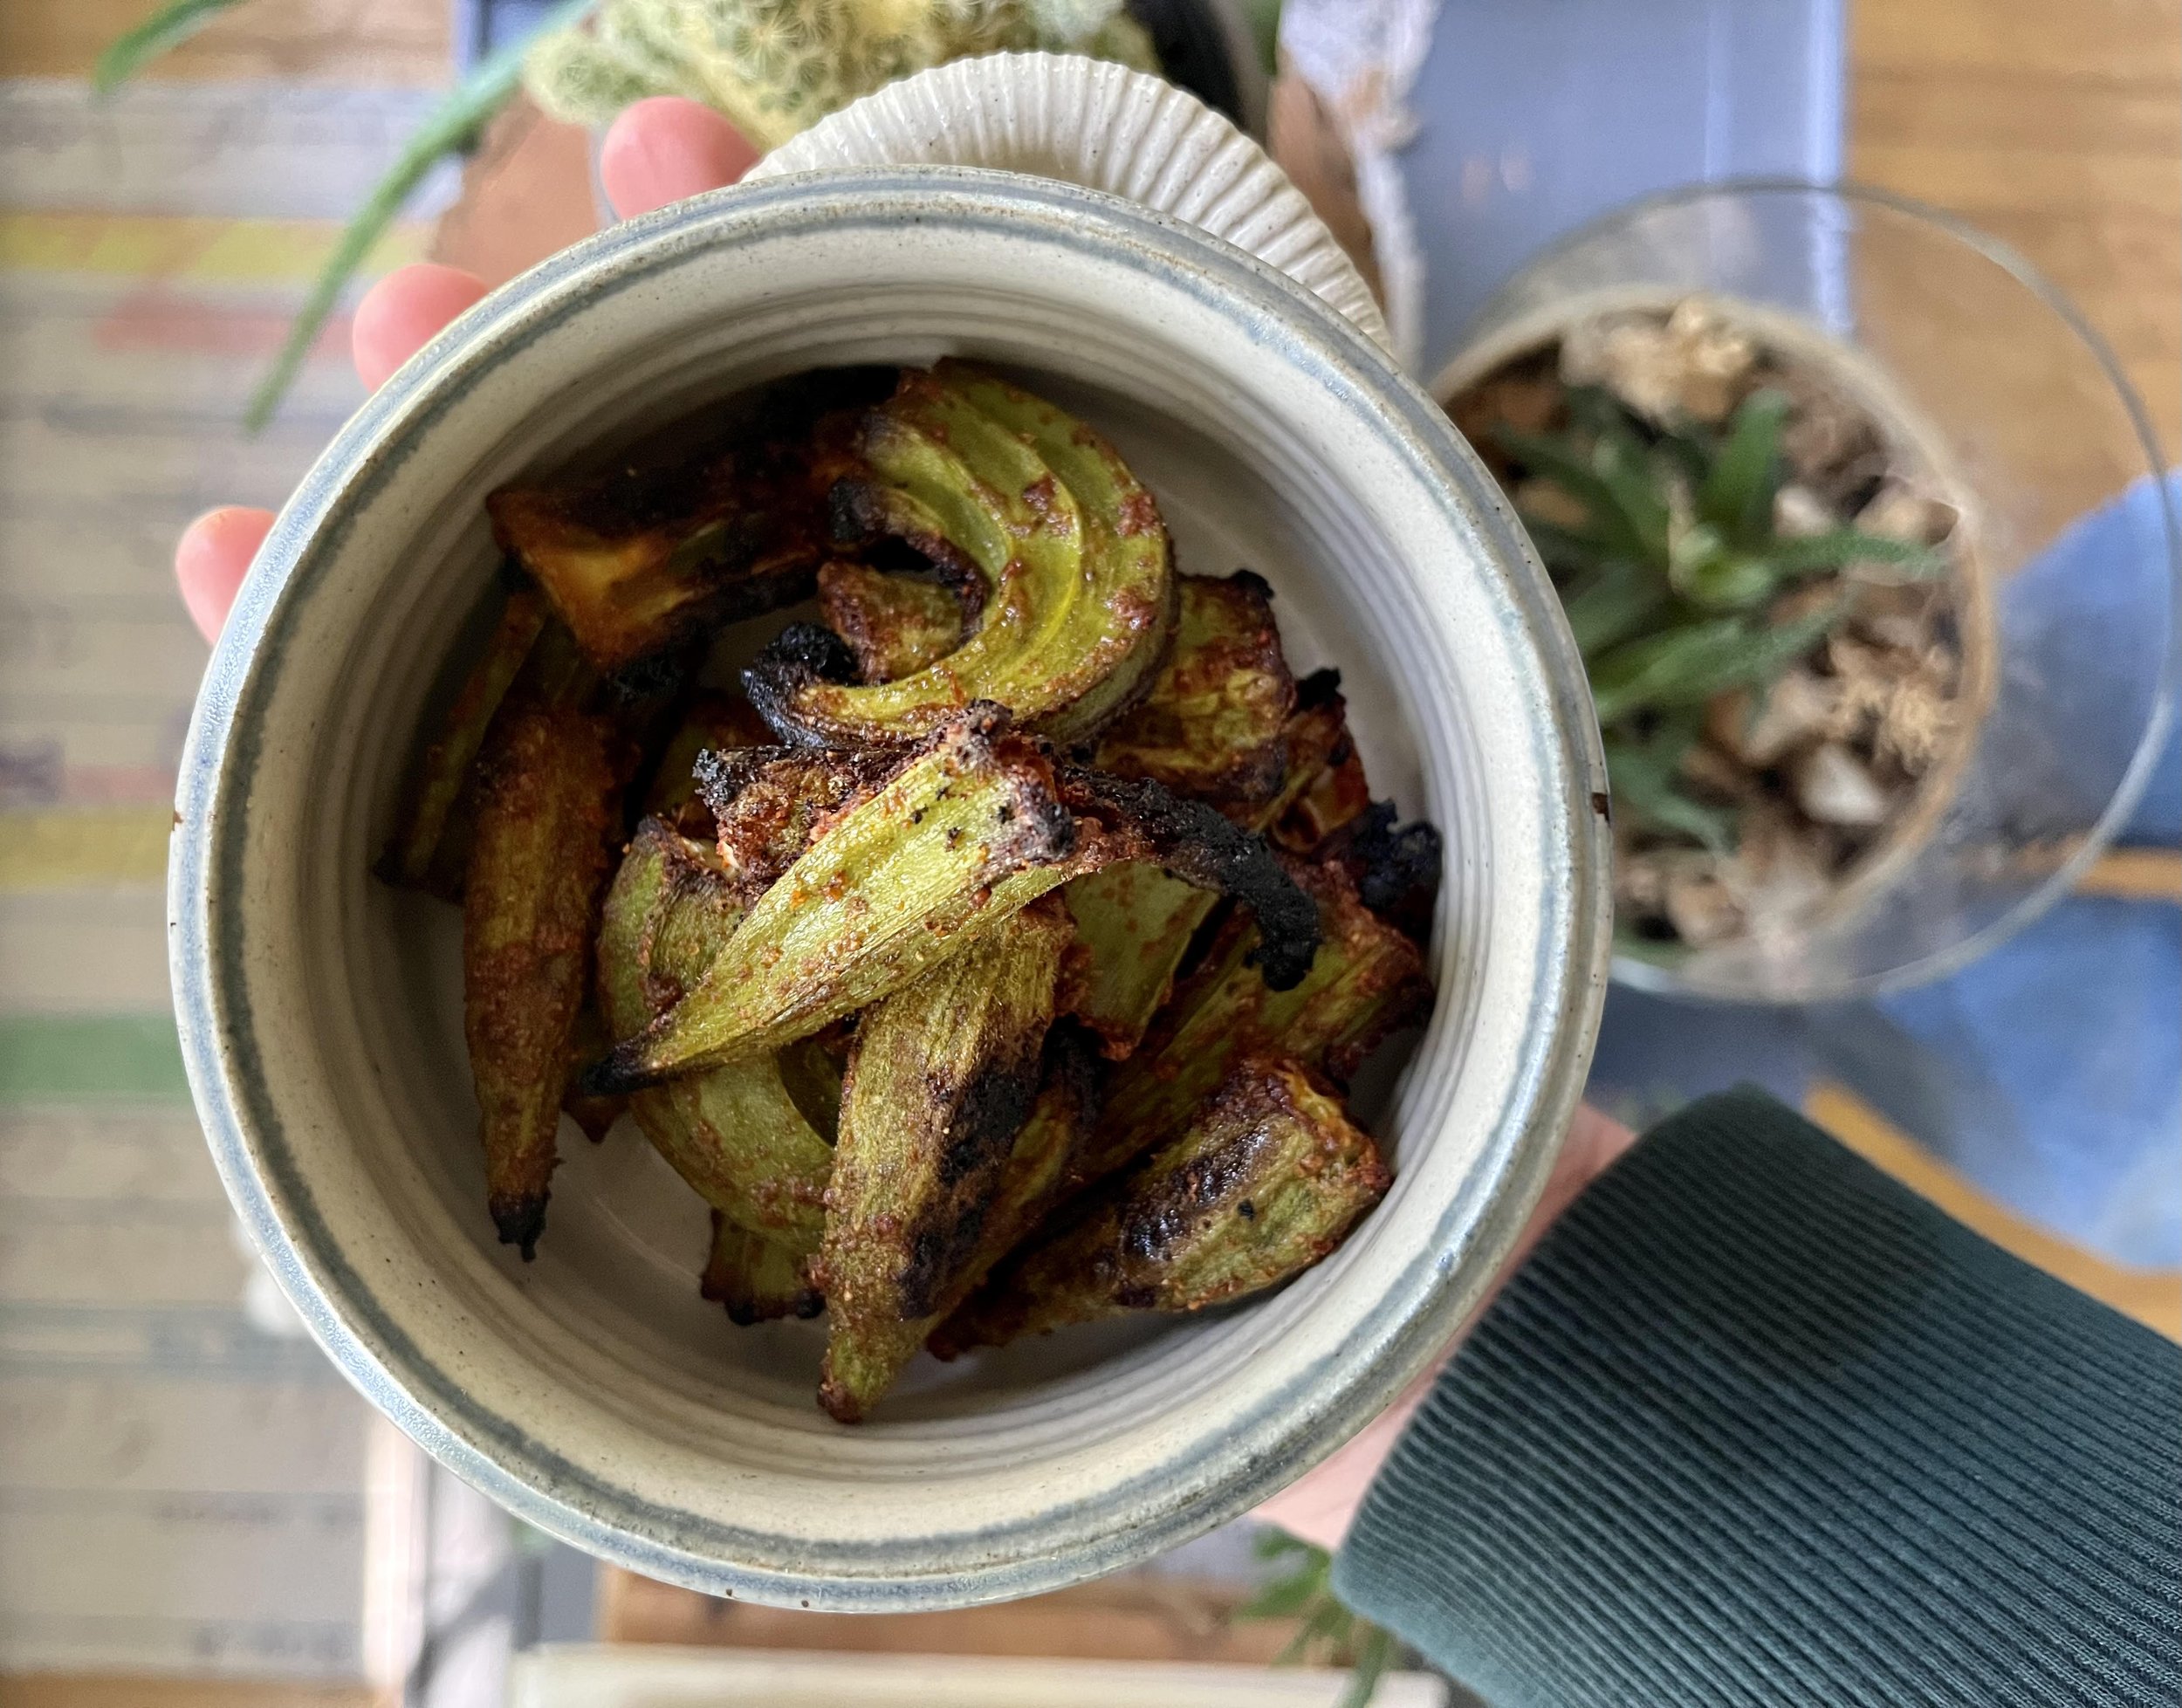
Oven-Charred Okra

Okra is a divisive veggie. It’s unfamiliar to some, and often thought of as slimy for anyone who is aware of it. This super easy oven-roasted recipe is here to help you change your tune, though! They melt-in-your-mouth, and the buttery spices are delicious.

Ingredients

1 quart okra

2 tablespoons salted butter, melted

1 teaspoon paprika

1 teaspoon garlic powder

1/2 teaspoon brown sugar

1/4 teaspoon salt

1/4 teaspoon black pepper

Instructions

  1. Preheat oven to 425°F.

  2. Line a baking sheet with parchment paper and set aside.

  3. Wash okra and cut into 2-inch sections. If some pieces are wider than an inch, slice in half lengthwise.

  4. Transfer washed and prepared okra to a medium mixing bowl and pour over melted butter.

  5. Mix to coat okra, then add spices, sugar, salt, and pepper.

  6. Mix to coat again.

  7. Transfer seasoned pieces of okra to the prepared baking sheet and place in the oven.

  8. Bake for 20 minutes, until okra are softened and starting to appear charred.

  9. Eat as is, or pair with a dip made with Greek yogurt, mayo, and spices of choice. Curry powder and cayenne would be tasty!

Recipe developed & photographed by Alex Chesney, RD

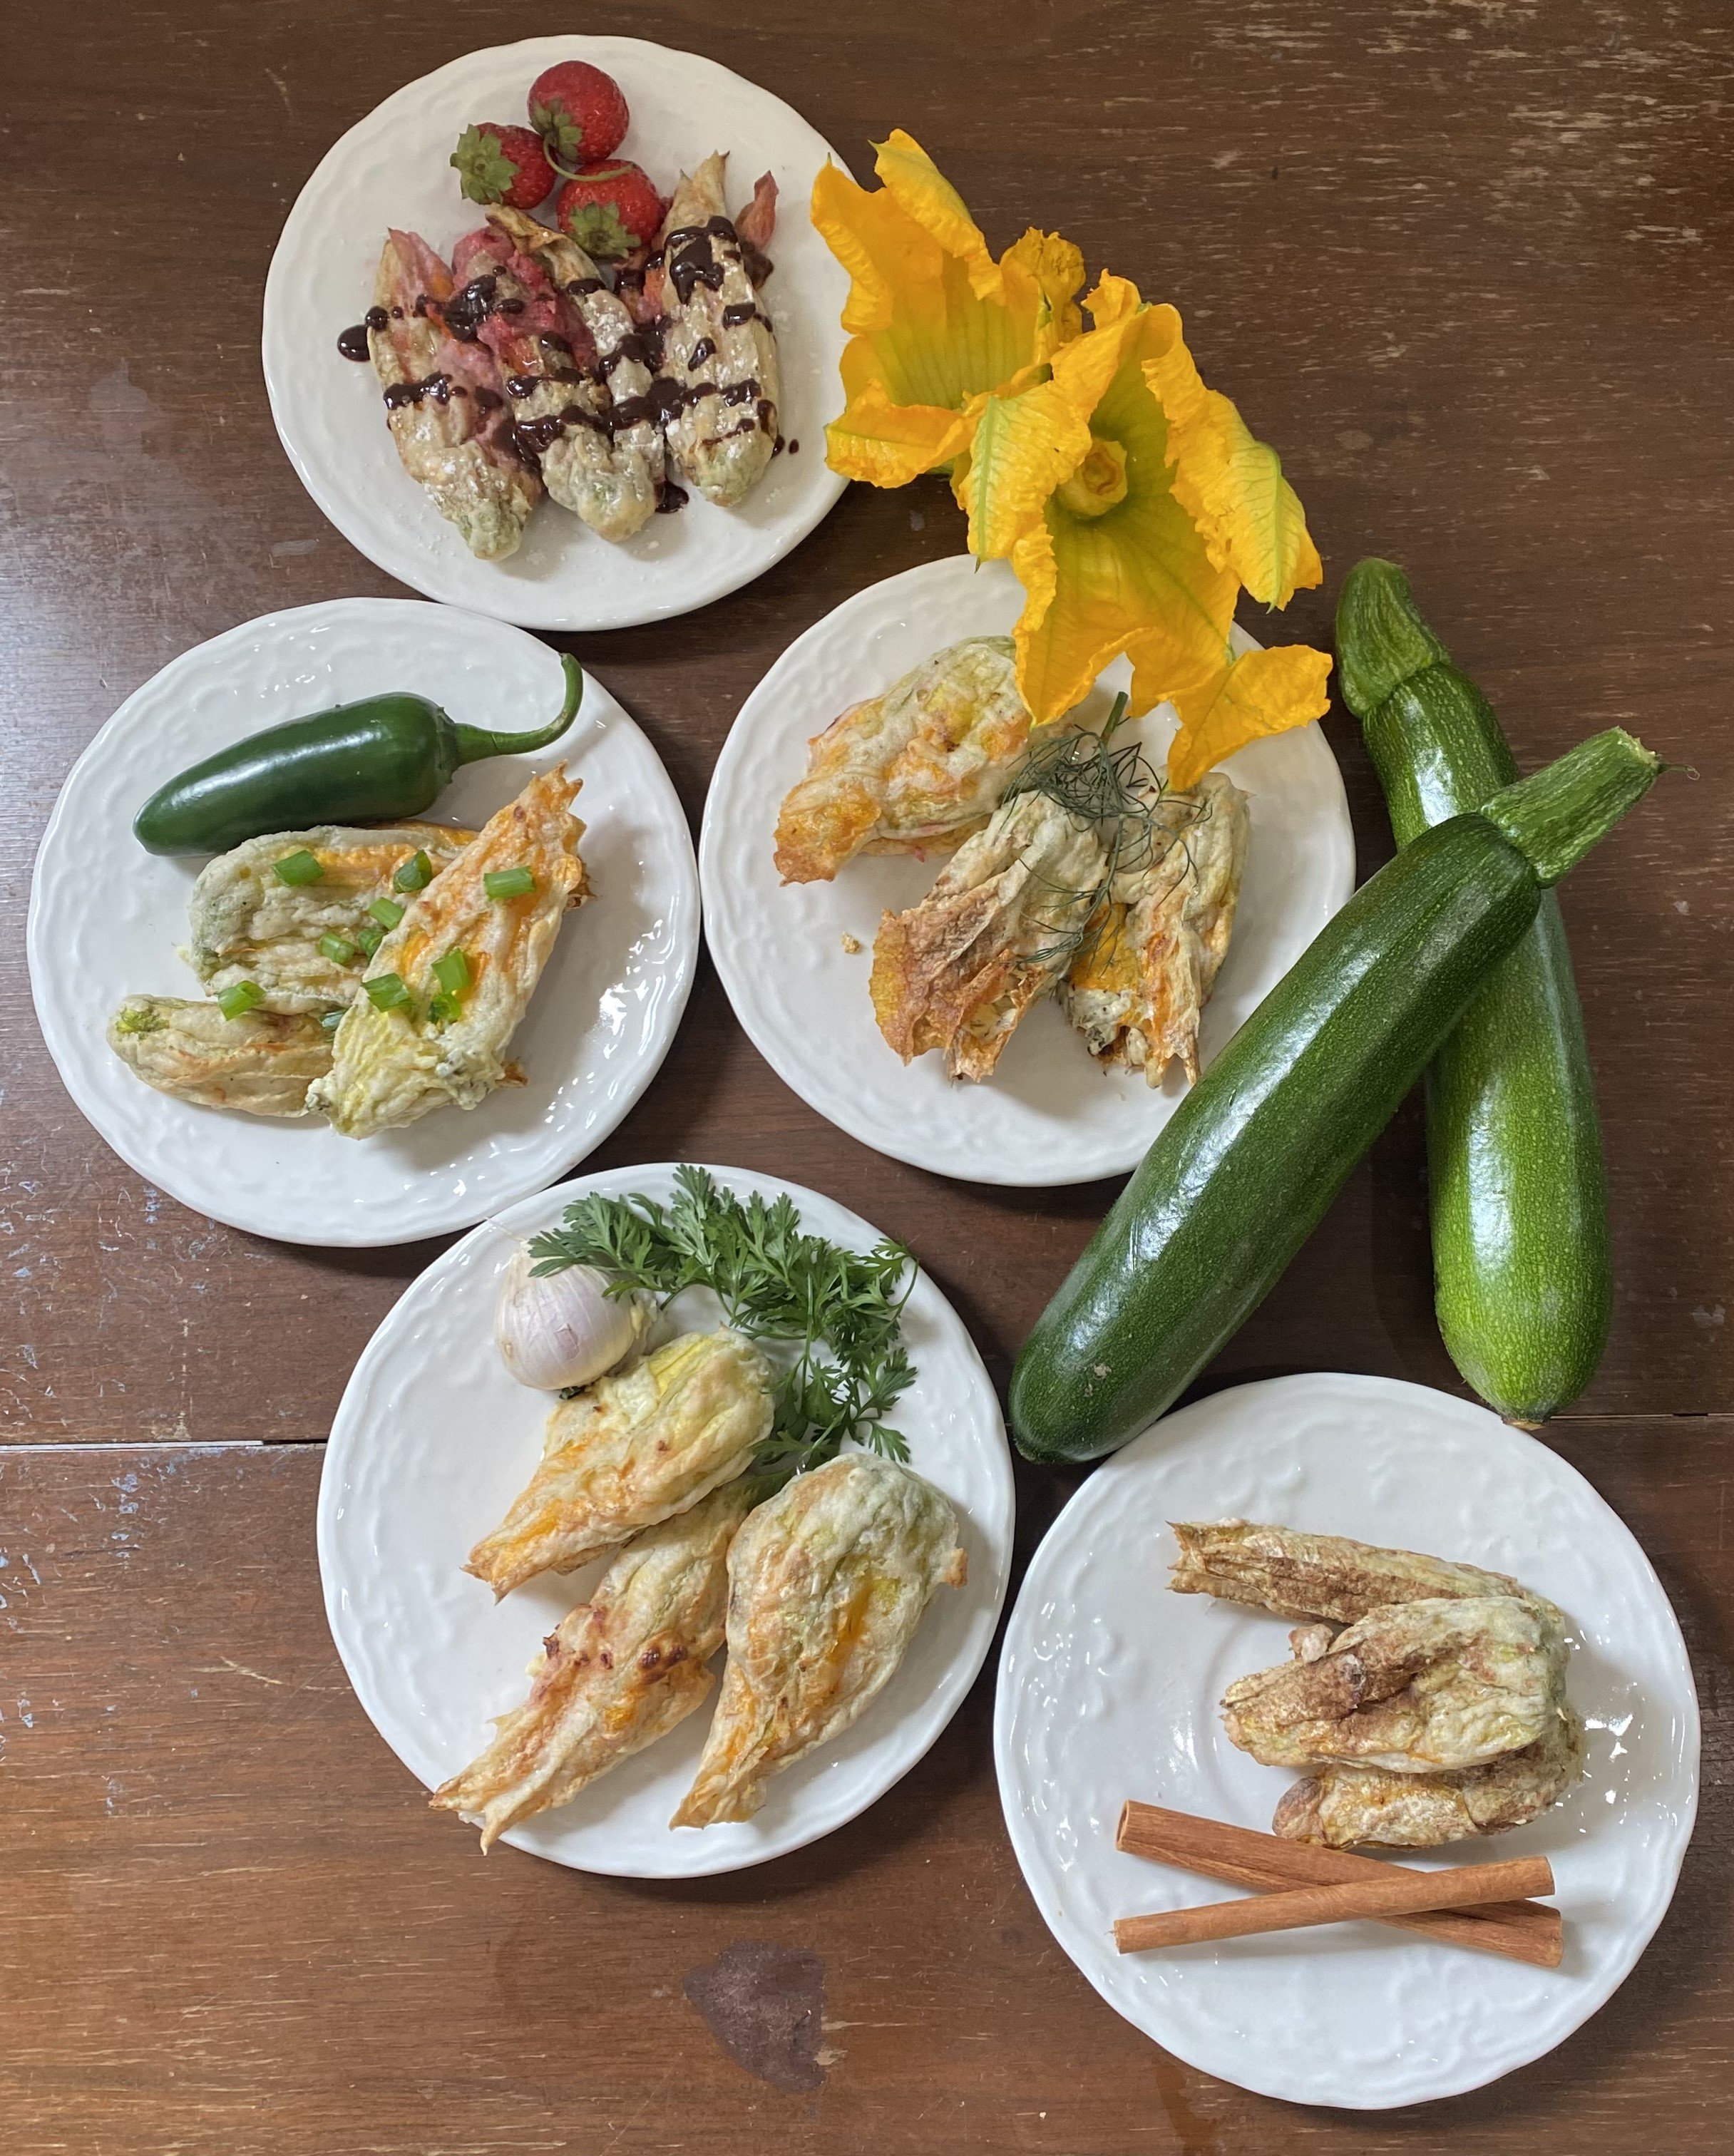
Stuffed & Air-Fried Zucchini Blossoms

Squash blossoms are found in the cuisine of many cultures, such as Italian and Mediterranean dishes. Often referred to as delicacies, they are typically only found at farmers’ markets, so try to get your hands on them while you can!

Stuffed squash/zucchini blossoms may not be familiar to everyone, but they make for a unique appetizer or addition to many dishes. Our suggestion is to be creative and make them your own! That’s exactly how we approached developing the following recipes, grabbing whatever ingredients we had in the garden and trying a number of unique combinations.

Ingredients: Batter

1 cup all-purpose flour

1 cup water, room temperature

Tip: Prepare the batter with oat flour to make the recipe gluten-free/ Celiac-friendly.

Ingredients: Filling

1 block cream cheese

+ additional spices, herbs, fruits and vegetables (5 variations listed below)

Tip: To have softer cream cheese to work with, remove the block from the fridge about two hours prior.

1. Chocolate Strawberry Cheesecake (4 blossoms)

4 large strawberries

1 teaspoon honey

Topping:

1/4 cup semi-sweet chocolate chips, melted

icing sugar

2. Pumpkin Spice Cheesecake (4 blossoms)

1 tablespoon pumpkin spice

1 teaspoon honey

3. Herb & Garlic (4 blossoms)

1 clove garlic, minced

1 tablespoon fresh parsley, chopped

scant ½ teaspoon dried thyme

1 onion slice, chopped

salt & pepper (to taste)

4. Spicy Dill (4 blossoms)

3 tablespoons fresh dill, finely chopped

½ teaspoon red pepper chili flakes

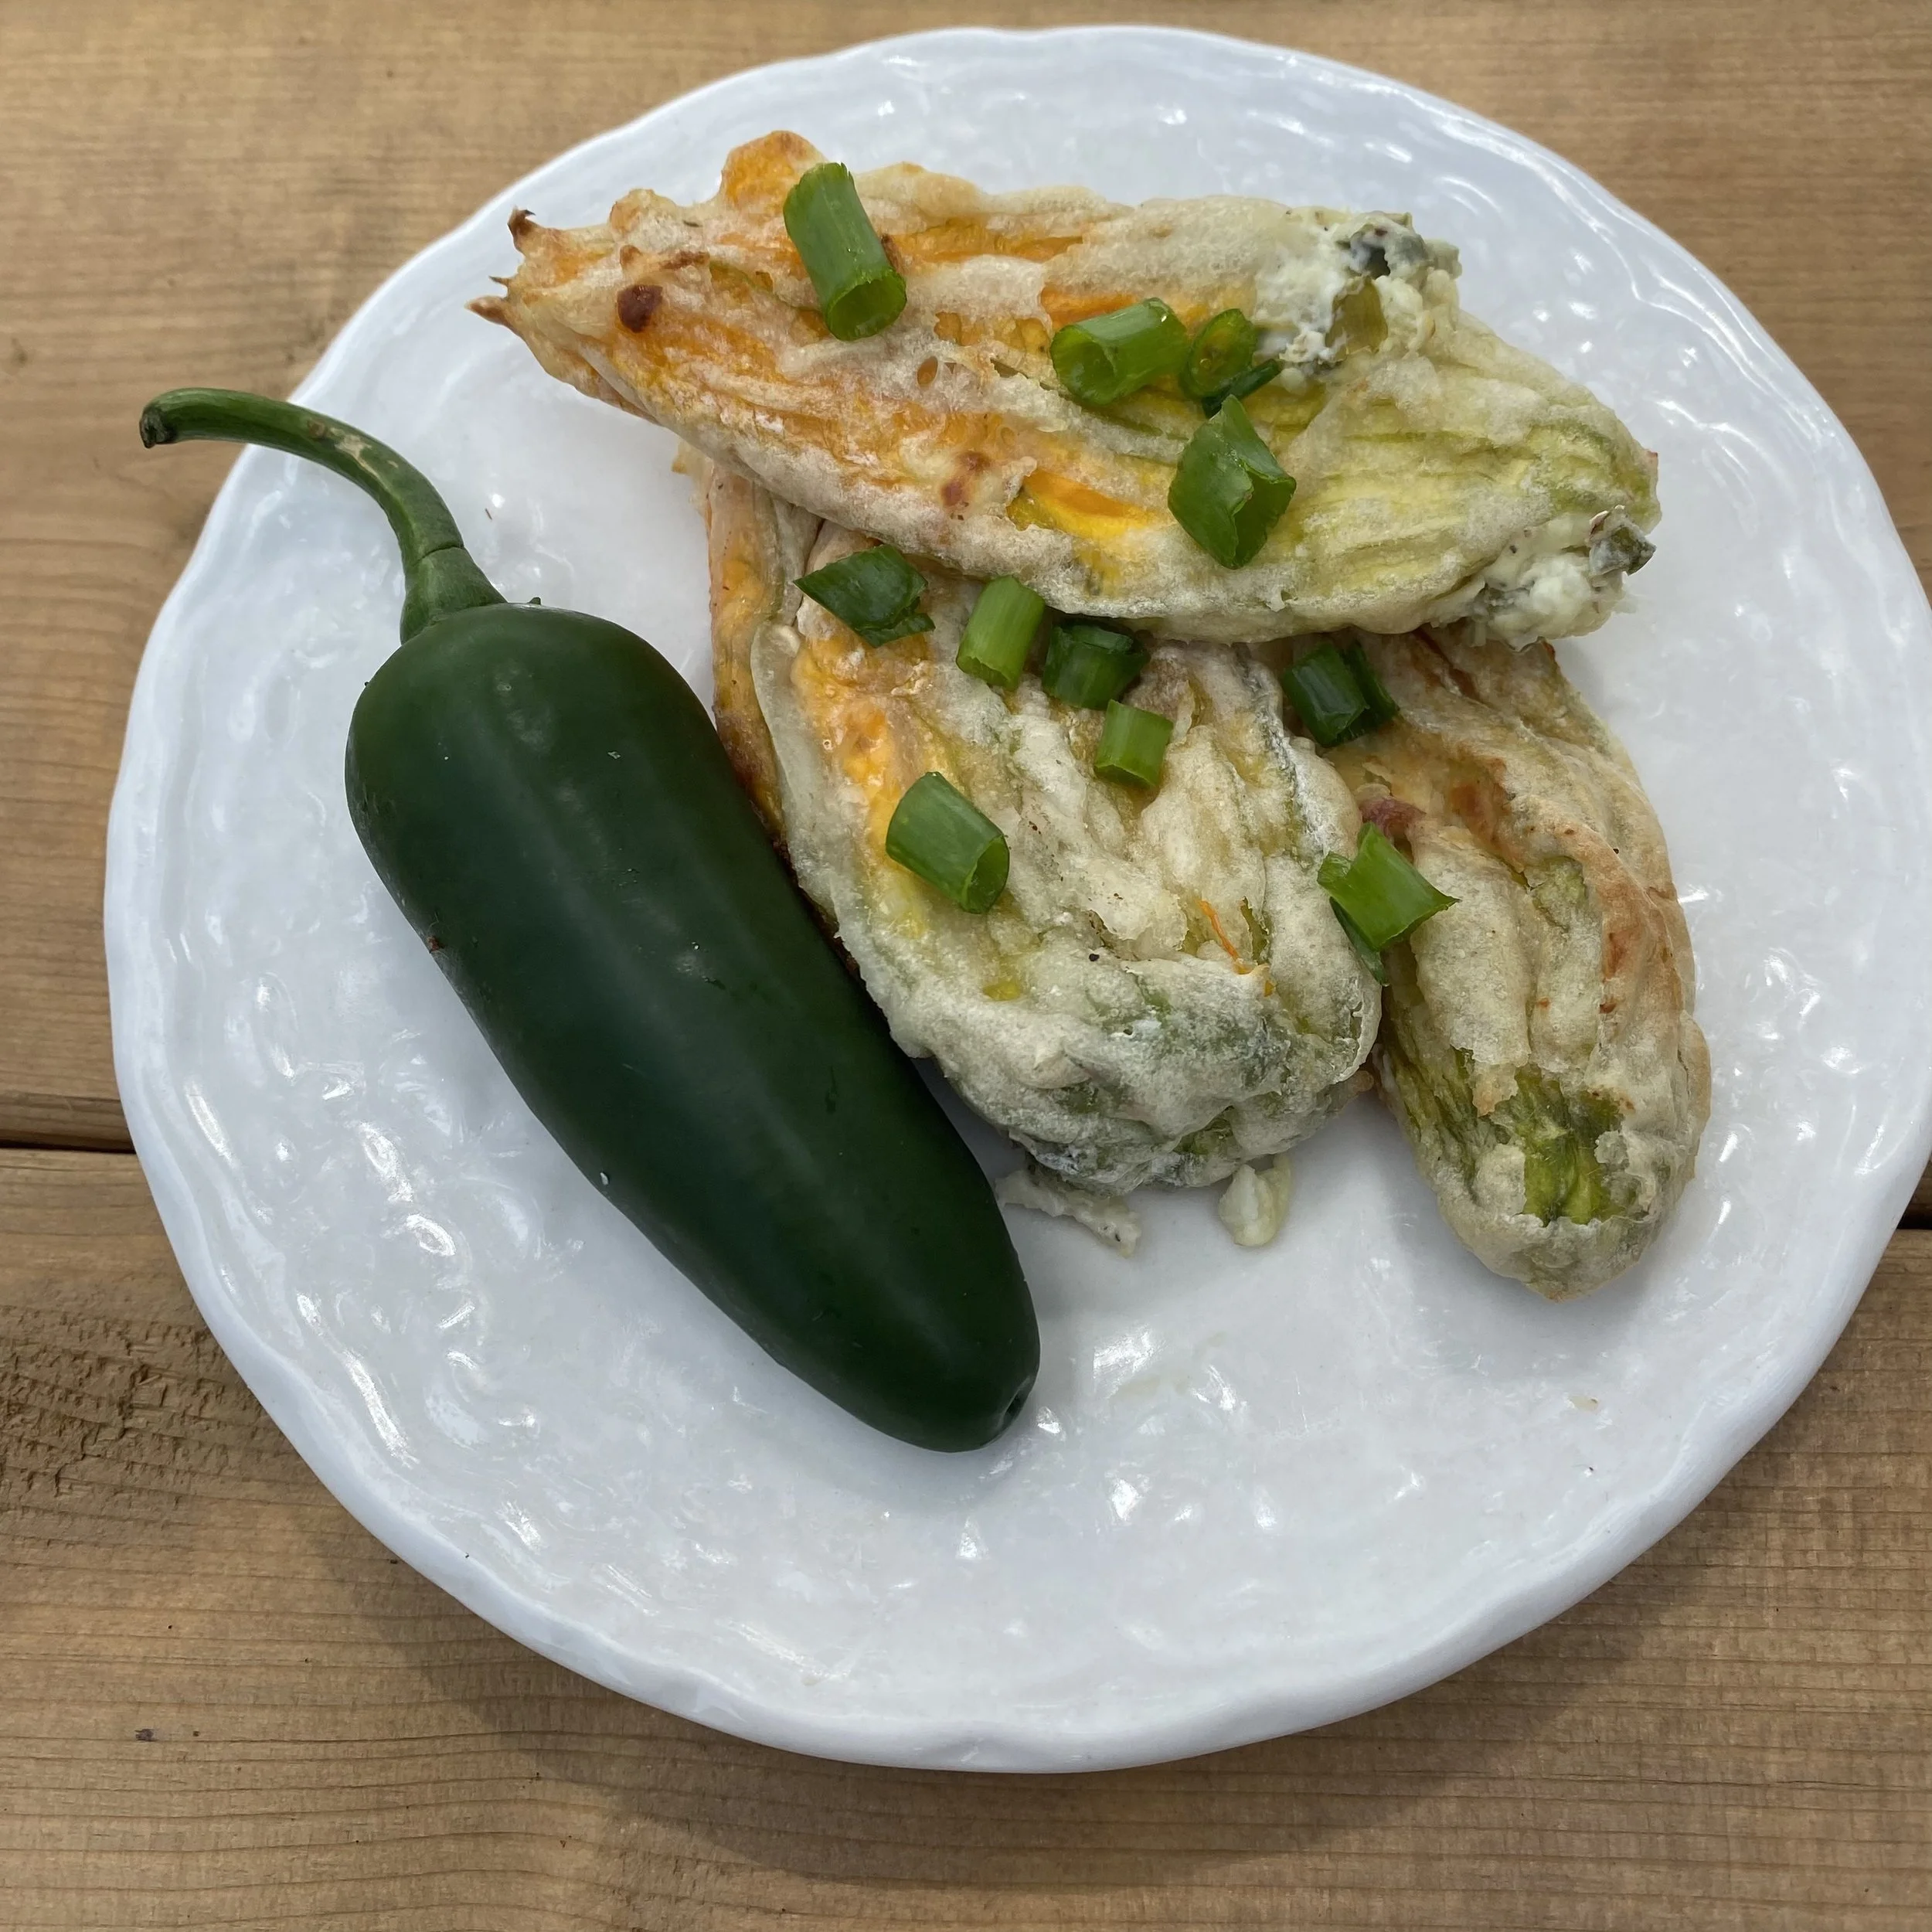
5. Jalapeño (4 blossoms)

2 green onion tops, chopped

1 jalapeño, diced

1 clove garlic, minced

salt & pepper (to taste)

Instructions

  1. Prepare all ingredients according to the suggestions above (e.g., mince, dice, etc.) and set aside.

  2. Gently rinse blossoms with water and dry with a paper towel. It’s okay to open the petals (even if they tear a bit) to ensure there aren’t any bugs. The entire flower is edible, but most people remove the bud from the inside (called the stamen) and the stem from the base of the flower.

  3. In a medium-sized bowl, whisk together the flour and water to create the batter. Set aside for at least 10 minutes.

  4. Preheat air fryer to 370°F.

  5. For each flavour variation, combine all ingredients together in a small bowl and fill each blossom with about 1 ½ tablespoons of the mixture. To make the filling step easier, transfer your filling to a piping bag. If you don’t own one of these, don’t worry! You can make a quick & easy at-home version by filling a Ziploc bag and snipping off one corner.

  6. After the blossoms are filled, carefully coat the outside with batter. Although a bit messy, we found it easiest to do this by hand. Try your best to close the flower so that the filling doesn’t run out when frying.

  7. Evenly coat the air-fryer basket with olive oil and lay down 6 battered blossoms, ensuring they’re evenly spaced. You may be able to fit more depending on the size of your basket.

  8. Fry for 12 min, carefully flipping halfway.

    Tip: After frying, if the blossoms are stuck to the bottom of the basket, give them 10 min to cool and they will be easier to remove.

Recipe developed by Alissa Debruyne and Emma Van der Burg, 2023 Dietetic Interns

A Guide to Storing Green Onion

Properly storing green onions can help maintain their freshness, flavor, and texture, allowing you to enjoy their culinary benefits for a longer period. Follow this guide to ensure you store your green onions effectively:

Choose Fresh Green Onions: Visit our pick-your-own patch and select green onions that are firm, crisp, and have vibrant green tops. Avoid ones with wilted, yellowing, or slimy leaves.

Store Unwashed: It's best to store green onions without washing them, as moisture can promote spoilage. If they are dirty, gently wipe off the dirt with a damp cloth or paper towel.

Refrigerator Storage: Store in the refrigerator. There are a few methods to store green onions. These methods help maintain the right level of moisture while providing adequate ventilation.

Method 1:

  • Place the green onions in a heavy bottomed jar, glass, or vase root-side down. Fill the container of choice with cold or room temperature water, just enough to cover the roots.

  • Cover the green onions with a plastic Ziploc bag. Clinch the bag slightly around the green onions to store some of the humidity within the bag and zip the bag closed as much as possible.

  • Transfer the jar to the refrigerator. Replace the water every couple of days.

Method 2:

  • Alternatively, instead of placing the green onions in a jar, wrap the green onions in a slightly damp paper towel. This provides the humidity needed for proper storage.

  • Place the wrapped green onions inside a plastic Ziploc bag or storage container; it does not need to be sealed airtight. Remoisten the paper towel if it becomes too dry or too wet.

Utilize Quickly: While green onions can be stored, they are best used fresh for maximum flavor and texture. Try to use them within 1-2 weeks of purchasing.

Freezing Green Onions: You may also choose to freeze them for later use. Chop the green tops and white bulbs separately, spread them on a baking sheet to freeze individually, and then transfer them to an airtight container or Ziploc freezer bag. Frozen green onions are best used in cooked dishes rather than fresh ones due to the change in texture.

The jar or damp paper towel methods are great for storing various herbs that have delicate leaves and stems. Try these methods with other herbs as well!

  • Parsley

  • Cilantro

  • Basil

  • Mint

  • Dill

  • Chives

  • Oregano

  • Thyme

  • Rosemary

  • Sage